
Add a product in Baramen’s wholesale store
How to Add a Product to Baramen’s Wholesale Store
This guide will teach you how to effectively add a product to Baramen’s wholesale store with this step-by-step tutorial.
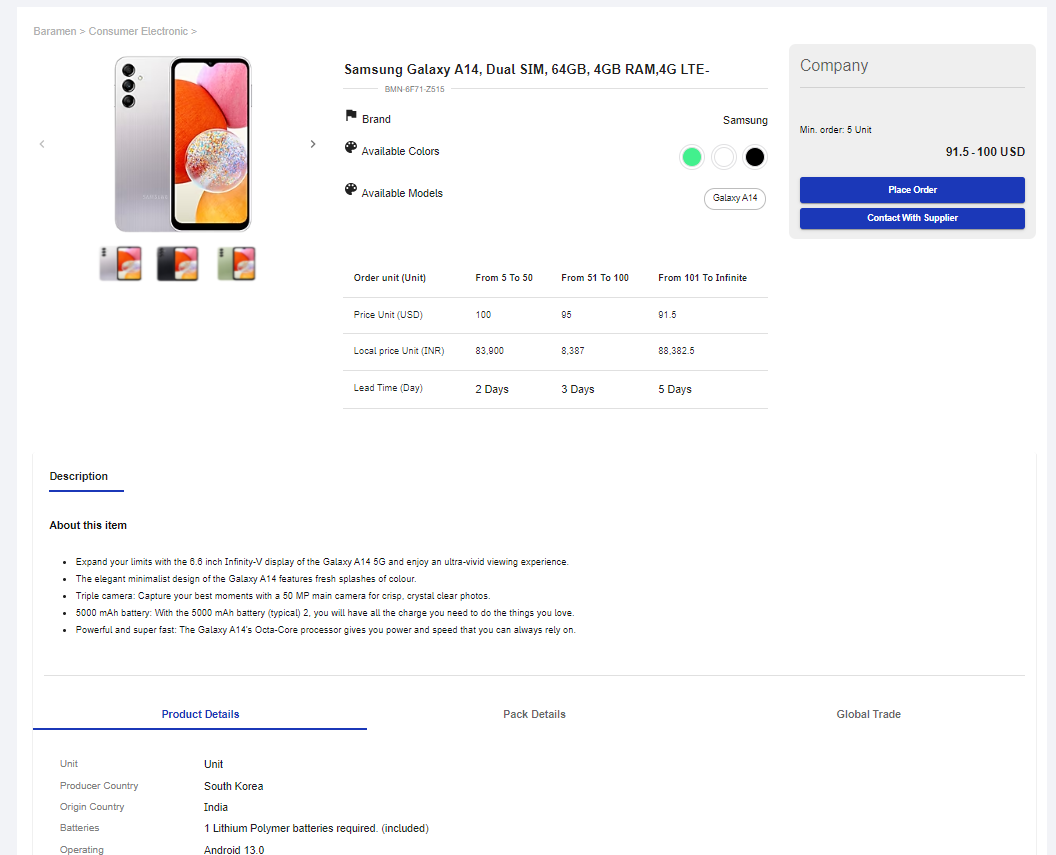
Upon completing the product registration process, your product will be seamlessly integrated into the Baramen store, as demonstrated below.
Steps for Adding a Product in Baramen's Wholesale Store
Step 1: User Registration
Start by registering on the Baramen website to create your account and receive your username and password.
Step 2: Log into Your User Panel
Log in using your credentials to access your personal dashboard.

Step 3: Access the Seller Panel
From the left-hand menu, select “Seller”, then click “Add Product” under the “Store” menu.
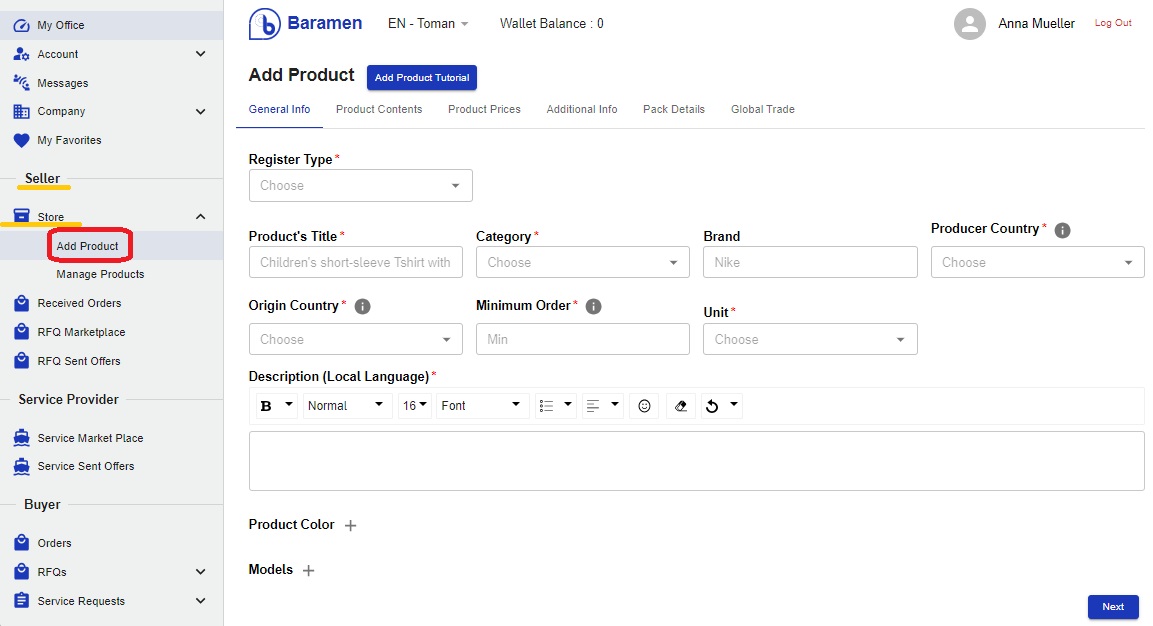
Step 4: Enter Product General Information
Fill in the required details:
- Register Type:
Choose Individual, Store, or Company. If listing under a store or company name, complete your store/company info in your account settings first. - Product Title:
Use a descriptive title including the product’s name and key features (e.g. Samsung A14 mobile phone with 64GB, 4GB RAM, dual SIM – black). - Category:
Select the appropriate category from the list. - Brand:
Enter the brand name (in local language or the brand’s original language). - Producer Country:
Where the product was manufactured. - Origin Country:
Where the product is currently available and sold (e.g. Samsung phone made in Korea, sold in Turkey). - Minimum Order Quantity:
State the minimum quantity buyers must purchase. - Unit:
Select how your product is counted (e.g. pieces, boxes, cartons). If your preferred unit is missing, choose “Other” and describe it. - Description:
Provide a detailed description of your product. - Color:
Click the [+] button to add color options. - Model:
Click the [+] button to enter product models. If different models have different prices, add them separately.
When done, click “Next” to move to the Product Content tab.
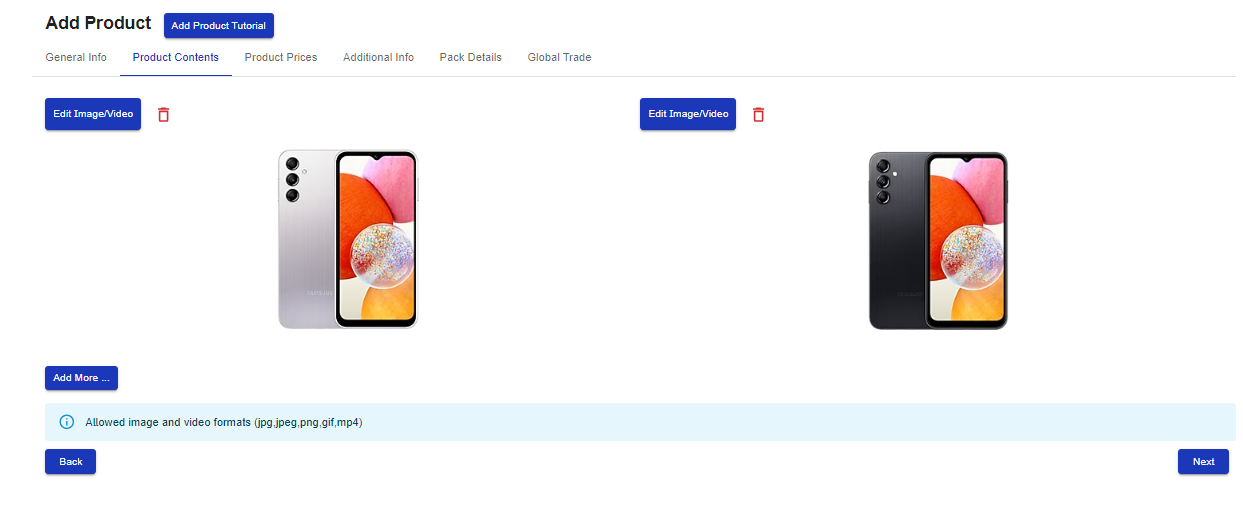
Step 5: Add Product Content
Upload images or videos to showcase your product.
Tip:
First image/video is the main display.
Each file must be under 5 MB.
Click “Add More…” to upload additional files.
Click “Next” to proceed.
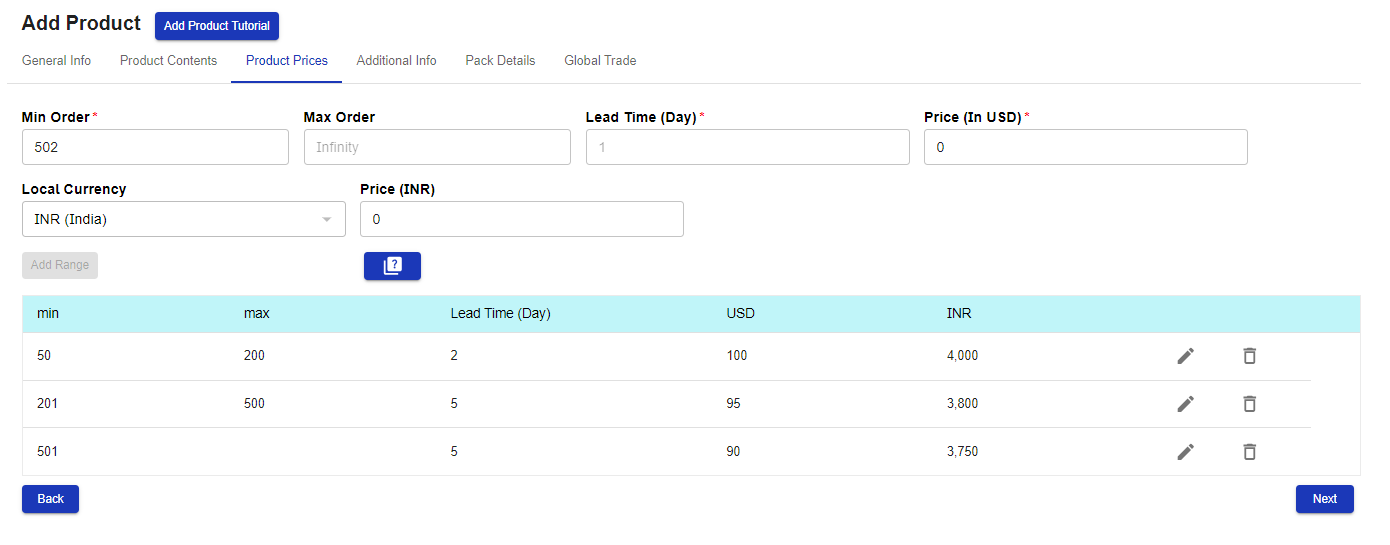
Step 6: Define Product Prices
Set different pricing options based on order quantity:
🔢 Ranges:
Add order quantity, preparation time, and price (USD is required).
Add local currency (e.g. INR) if needed.
For example:
50-200 units: 2 days prep, $100 USD / 4,000 INR
201-500 units: 5 days prep, $95 USD / 3,800 INR
501+ units: 5 days prep, $90 USD / 3,700 INR
Tip: If you don’t set a maximum order quantity for the last range, it will be considered unlimited.
Click “Next” to continue.
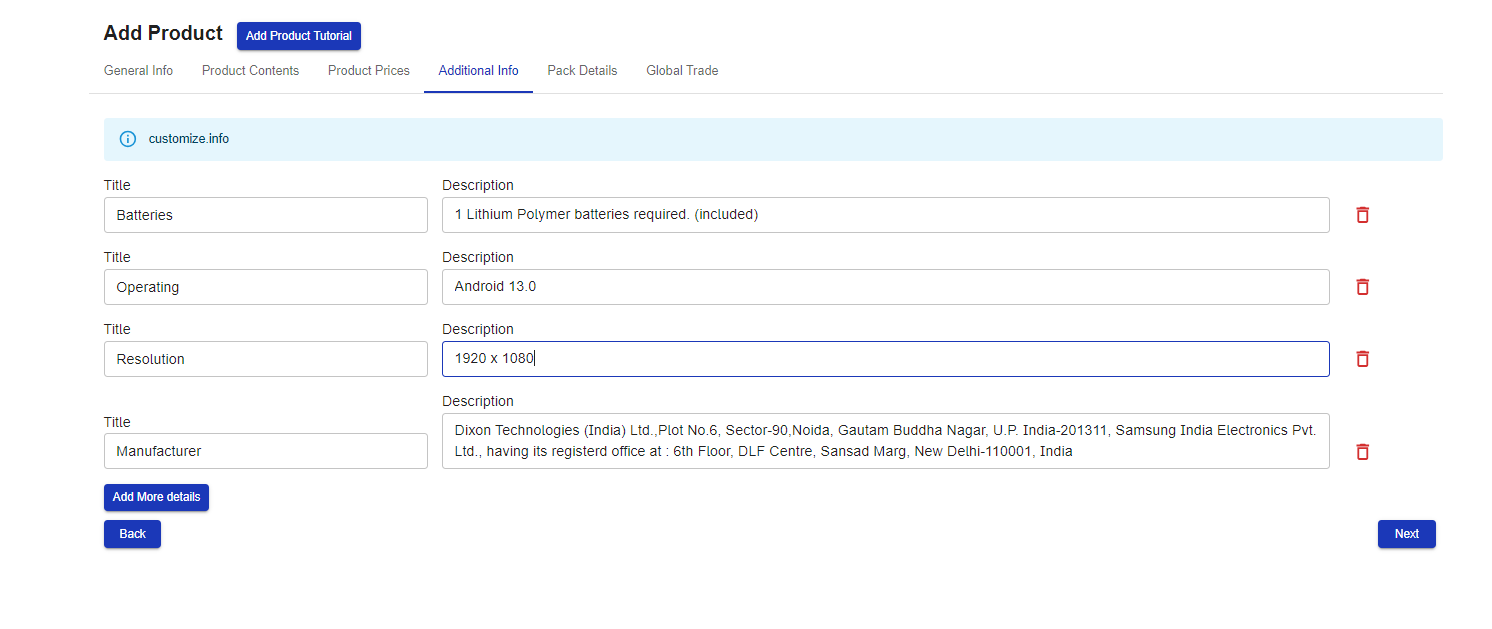
Step 7: Additional Information
Provide detailed specs like:
Materials
Dimensions
Accessories
Use the “Title” field (e.g. “Material”) and the “Description” field (e.g. “100% cotton”). Click “Add more information” to add extra details.
Click “Next” to proceed.
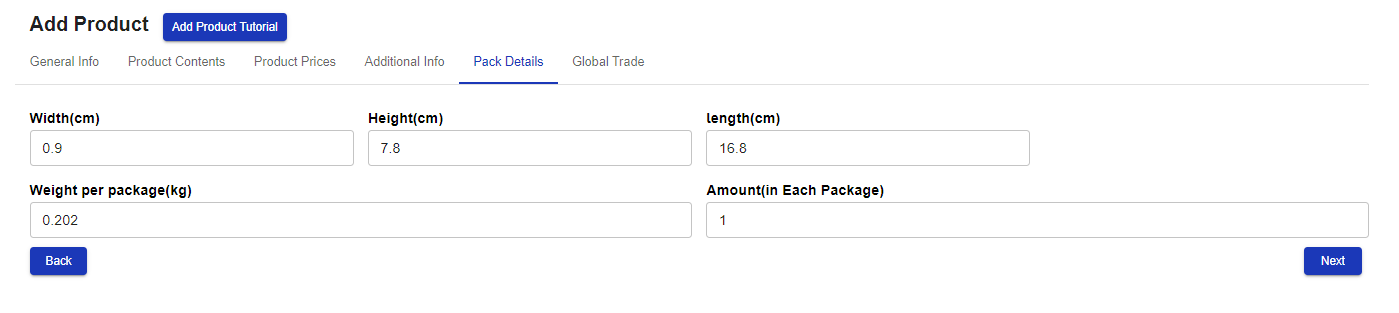
Step 8: Pack Details
Enter packaging info:
Width, length, height, weight
Number of products per package
Click “Next” to continue.
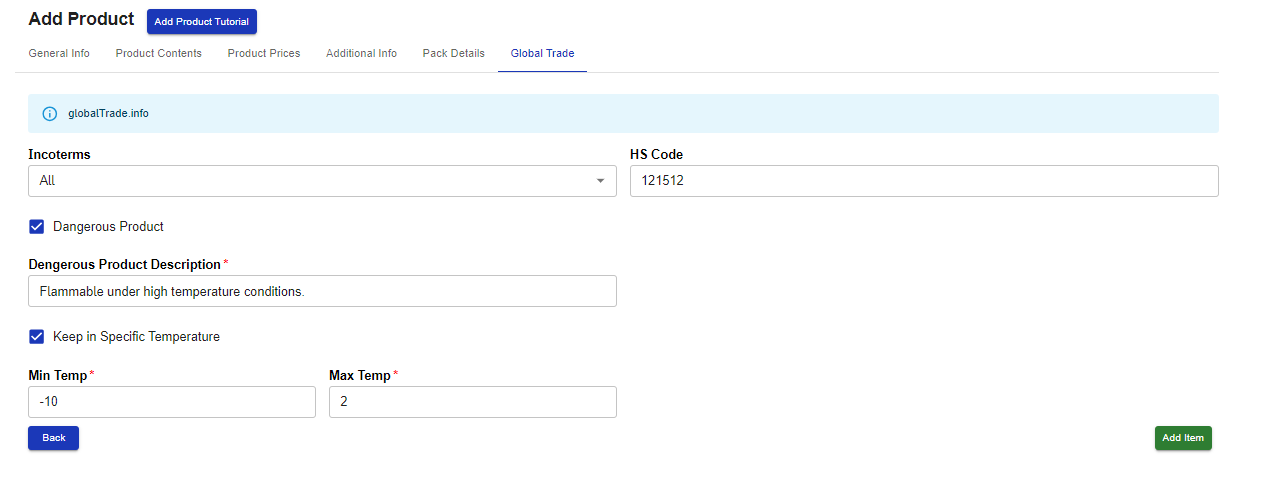
Step 9: Global Trade (Optional)
If selling internationally, fill in:
✅ Incoterms
✅ HS Code
✅ Hazard Info: Tick the box and provide a brief explanation.
✅ Temperature Conditions: Check the box and specify minimum and maximum temperatures (°C).
Click “Add Item” to publish your product in the store.
✏️ Editing Your Product
To make changes later:
Go to “Seller” > “Store” > “Manage Products.”
Click the pencil icon next to the product to edit.